
Selecting a Client
If you have not yet created any clients then you should look at the Creating a New Client guide first.
When you choose to Run a Client Session then the first thing that you need to do is to choose which client to apply it to. Therefore the first page you are presented with asks you to Choose an existing client by name. The client selection area offers two slightly different modes, partly down to personal preference but also to allow you to hide the names of other clients as much as possible if this is necessary.
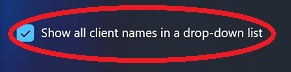
When you choose a client, you can either display a list of all clients or you can start typing the name of the client and just get a shorter list of names that match. This either/or option is determined by whether the checkbox next to the client control is ticked or not.
1. Choosing from a list of all clients

The above graphic shows the appearance of the selection mechanism when the check box is selected. In this image the selection box is closed and has no client name selected.
In this picture we have added a red circle, which we use to highlight where the "down arrow" is which allows you to open the list of clients which are registered to your subscription. When you click on the down arrow you will see all the clients that are visible to you, as shown in the next image below.

From here you can scroll through the list to find your client. NB The list is in first name order. When you have chosen a name from the list a button will appear with the wording Continue - click this button to proceed to the next session page.
Development note: As client numbers increase, particularly for clinics, this list could easily become too large to manage. During the onward development cycle we will introduce the ability to flag client records as inactive so that they can be excluded from searches by default. Other forms of filtering may also be considered if needed.
2. Typing a partial name for a smaller list of options
On this same section is a checkbox that determines the mode in which you can select the client.
On this same section is a checkbox that determines the mode in which you can select the client. If you untick the checkbox then the Choose client name from list changes function, from being a drop-down list to a text box. As you start typing a name then clients who have a matching sequence of characters in their name are displayed in a popup list.

As you start to typing letters, e.g. Jas in this case, then all clients with that sequence of letters in their name will be shown.

Please note that you are not limited to having to type the first few letters of the name. The letters will match from any part of the name, for example the letters at in this case reveal two clients where the names contain matching clients
Confirm the selection

Once you have chosen the client you will be working on then the Continue button will appear. Click this and you will be taken to the main session page.